PRODUCTION SETTINGS
PRODUCTION SETTINGS
Manage the settings for your production.
WATCH VIDEO TUTORIAL >
ADD PRODUCTION:
Add Production: + > Name > Choose Production Type > Add
To create a new production, simply hit the '+' button at the top of the Production list on the production home screen:
Add production.
1. Enter the name of the production.
2. Choose if you want the charts to be connected to either a:
PDF: You will import a PDF of the script or of the musical score (any PDF).
or
Staging Score: You will create a Staging Score for the production to thoroughly detail the blocking/choreography of the production.
3. Then select 'Add’. This will take you to Production Details menu for your new production.
Production Details:
Here you can enter or edit the name of the production, list the names of the creators of the show, enter the production date, import the show logo.
ADD LOGO:
Add Production Logo: Select Image > Choose Image from iPad or computer.
To import the production logo, simply hit 'select image' and then scroll through the images from your photo gallery. This logo will appear at the bottom of each chart in your production.
STAGE DIMENSIONS
The stage dimensions you choose for your production will be the dimensions you choose to show on each chart. You might choose not to show the entire backstage space so you can focus on the stage pictures and only a little bit of the backstage space. The larger the space, the smaller each item will show on the screen, so it’s useful to show only the space that you intend to use for the production on your charts.
ENTER THE STAGE DIMENSIONS: Settings > Stage Dimensions:
WIDTH OF STAGE:
Usually, this would be the width of the proscenium opening – whatever is seen by the audience as ‘onstage’. It is this dimension where the staging number line will appear. In this example (40 ft.) the number line will go out to 20 on each side.
DEPTH OF STAGE:
Enter the measurement from the front edge of the stage to the depth you wish to show on each chart. In this example, even though the entire depth is 35 feet, the user has selected to show only 28 feet. The upstage scrim lies at that point and therefore no actors or scenery will be placed there:
OFFSTAGE WIDTH:
Enter the amount of offstage space you wish to show on each side of the stage. It’s useful to show at least SOME of the offstage space so you can show where the performers or scenery is holding prior to coming onstage. The number you choose here (5 ft. shown here) will be shown on both sides of the stage.
This creates the dimensions for your production.
IMPORT GROUNDPLAN:
IMPORT GROUND PLANS: Settings > Stage Dimensions > Edit Permanent Stage >
You can upload any jpeg or png file into the application for use in your production.
SAVE THE IMAGE TO YOUR COMPUTER or IPAD:
Once you have the JPG or PNG file in your photo gallery on your device, you want to IMPORT that file into your production:
Measure from Image tool.
Settings >Stage Dimensions > Edit Permanent Stage > Import Set Design
Here you can ‘Select Image’ from your device. Select the image you want to import. Give the image a name and a dimension. This will be the dimension of the entire image, including any white space on the image. Note: it may be different from the dimensions you chose for the production and hit SAVE.
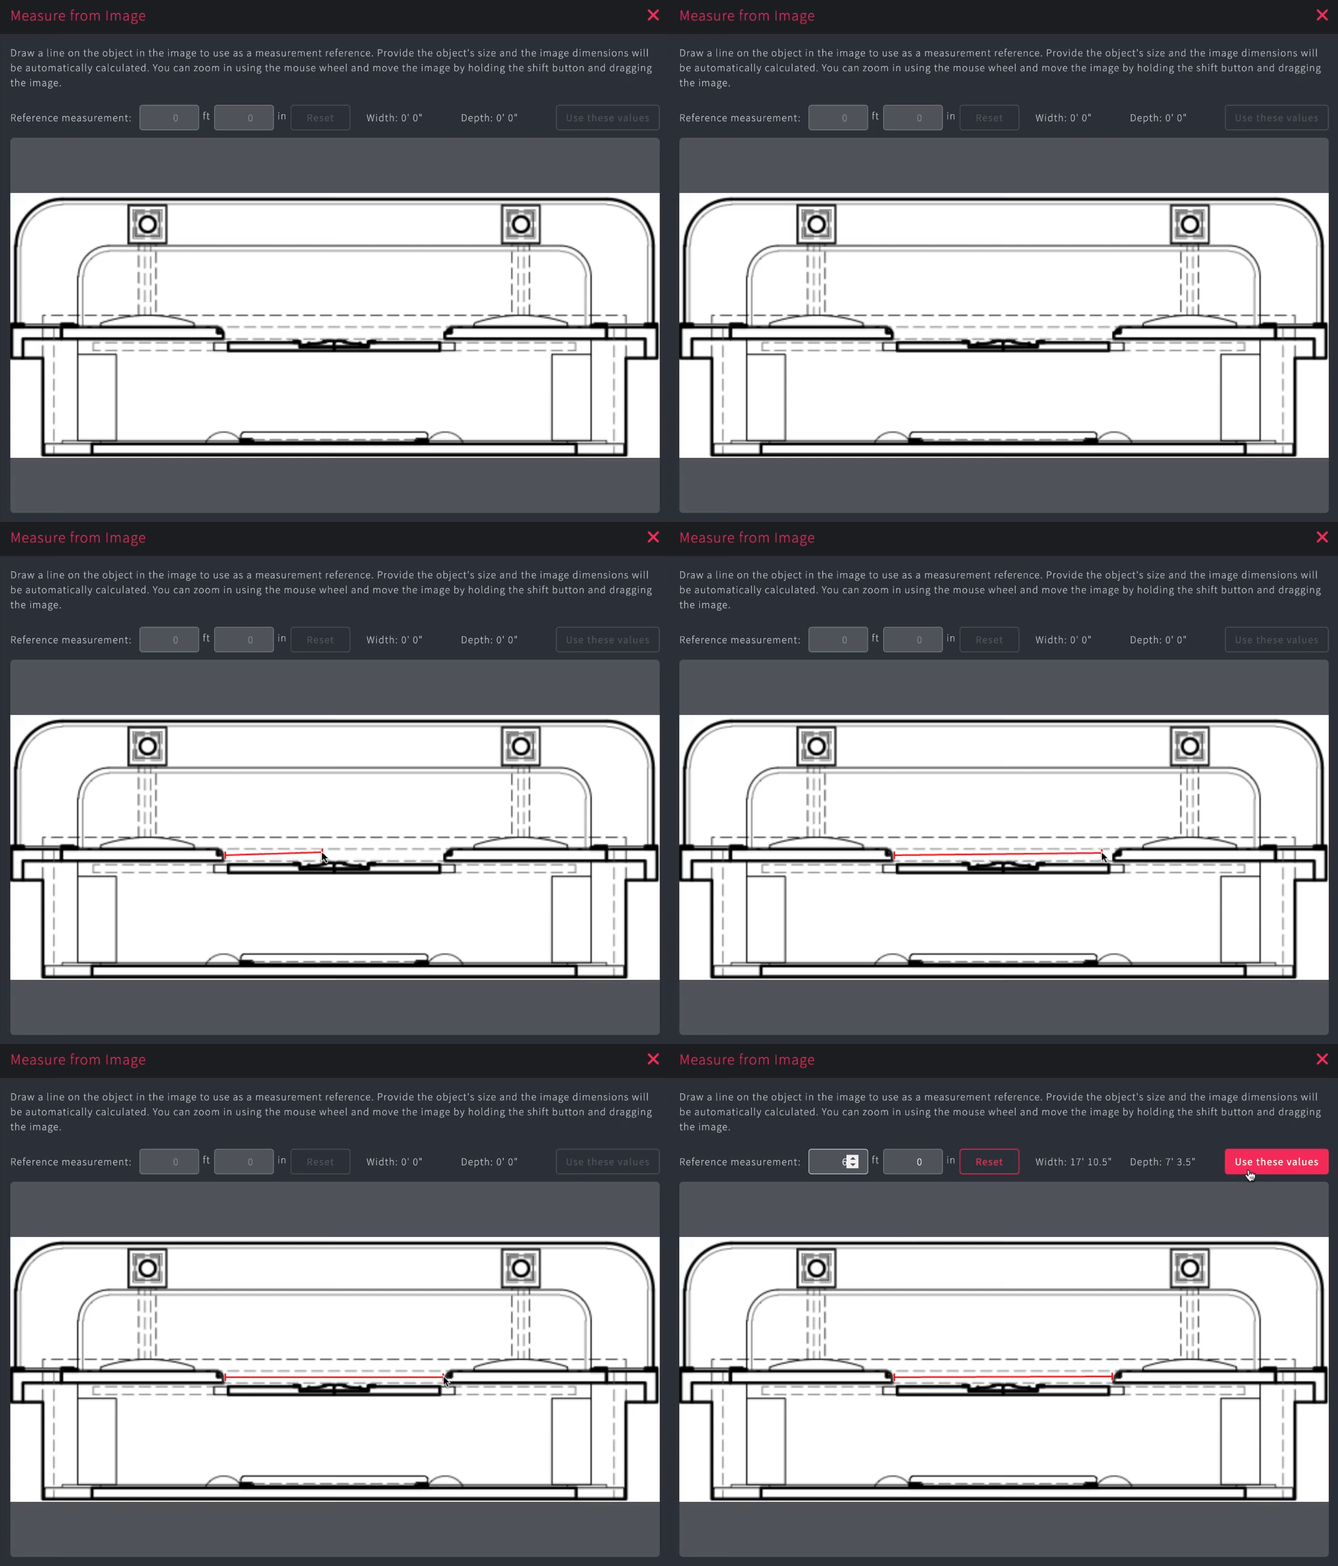
DID YOU KNOW? The easiest way to import your ground plan is to use the ‘measure from image’ tool. All you have to know is the dimension of one thing. After importing your ground plan, tap ‘Measure from Image’ then with you mouse click and drag across the dimension of a known dimension. Enter that dimension in the ‘Reference Measurement’ box and tap ‘Use These Values’. This will calculate the dimensions of the entire image.
EDIT PERMANENT LAYER:
Edit Permanent Layer: Settings > Stage Dimensions > Edit Permanent Stage
Once you have set the dimensions of your stage, you can now draw any permanent elements of your stage. Using the shapes, set pieces, and drawing tools, you can draw any structural elements that never move during your production - and will show up on every chart. For example, you can draw the proscenium arch, wings, and any other permanent elements that you want displayed on every chart in your production.
TIP: Keep in mind that whatever you ‘select’ will come to the top of the stack of items added while you edit. If you have imported a ground plan and are adding something small on top of that layer, make sure to select the item you want to adjust. It’s easy to select the giant ground plan by mistake, which will come to the top. By doing that, it may appear that you have lost the smaller items you were working on. It’s not gone, but it’s hiding under the ground plan. If you tap ‘CLEAR’ on the edit bay this will de-select everything and you can see everything in the layer it will appear on the charts.
CUSTOM NUMBER LINE:
Customized Number Line: To customize your number line, go to Settings > Stage Dimensions > Markers & Numbering. You can choose to show markers every X feet/cm, whether to show “0” at center, whether to show even, odd, or all numbers. The Preview will show you how it will look. The top of the preview shows you the actual dimensions of the stage and the bottom will show you what you will see at the front edge of the stage.
Vertical Markers: You can customize markers on the vertical plane by going to Settings > Stage Dimensions > Markers & Numbering. Here you select how frequently you wish to see a marker, where to place your “0” mark from the front edge of the stage, and whether to show even, odd, or all numbers. To preview how it will look, press SAVE, go back, to Stage Dimension page, press Permanent Stage to see a preview.
SET PIECES:
SET PIECES: Settings > Set Pieces
You can import or create any set pieces, or props, that you will use in your production. You can also choose to import the drawings from the designer if you prefer. These pieces will hold in the Set Piece Gallery until you want them onstage.
Import Set Piece: Settings > Set Pieces > Import
Measure from image.
You can easily import any design into the set piece list by selecting 'import', which will bring up the 'Import Set Piece' menu. Here you can select the image you want to import by tapping 'Select Image'. Then choose the image you want to import from your device. Then be sure to give the image a name and enter the dimensions of the piece. That way the imported image will remain the same on every page. Once you have selected the image, named it and entered the dimensions, tap 'Save' to add it to the saved list of set pieces.
NOTE: You can use ‘Measure from Image’ to set the measurement of one item on the set and the system will calculate the full dimensions.
Create New Set Piece: Settings > Set Pieces > Create
To draw a new set piece, hit the 'CREATE' button. This will bring up the 'set piece lab' in which you can draw your set piece. Enter the name of the piece (i.e. bedroom unit), and the dimensions for the set piece.
You can draw shapes and add text by hitting the ‘shape/text' button, which will allow you to draw squares, rectangles, circles, ovals, triangles, arcs, lines, arrows, curtains, and customized lines and curved lines and arrows, or freehand drawing. Choose the item you want to add to the set piece, it will appear in the lab and you can re-size the item by dragging the upper right corner of the object. Then you can move the object into the correct position and the correct scale.
Create Set Piece/Prop
TIP: Make sure your set piece is placed in the bottom left corner (0 x 0) of the lab. When you assign a dimension to the object the system will crop at the dimension you identify. Any items outside of the cropped area will not appear on the set piece. For example, if you create something with a 10 x 10 dimension, make sure everything you need is placed within the 0 x 0 and 10 x 10 area.
You can also use some of the pre-set set pieces in the StageWrite catalogue of chairs, benches, couches, stairs, instruments, tables, or use pieces that you have previously imported.
TIP: Once the set piece has been placed onto a chart, the dimensions cannot be changed. If you wish to change the dimensions, you can simply delete it from the charts and re-edit the piece.
PERFORMER ICONS:
Import Actor Icon: Settings > Performer > Import
You can import a JPG file as a performer icon. Press ‘import’ and select the JPG file you want to upload as the image for the performer. The dimension of the image will be saved as 2’ x 2’ so make sure your image is already cropped as a square so no distortion occurs.
Create Performer Icon: Settings > Performer > Add
Easily create unique performer icons by tapping the 'add’ button, which will bring up the 'New Actor' menu. On this menu, you can enter the Actor Name.
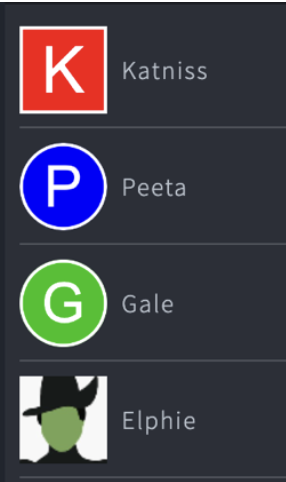
Enter the text you want to appear inside the icon. Note: It's useful to keep this text short or abbreviated so that you will be able to read the text when you enter the information on the chart.
Performer Name: This is the name the performer will be known as in the Staging Score. If you use an abbreviation in the actual icon, you can list the longer name here more easily.
Text for Icon: This is the text that appears within the icon shape.
Performer Icons
Re-size the Text: Using the slider, easily adjust how you want the icon label to fill the shape.
Choose the Shape: Choose square, circle, or diamond shape for actor icons.
Choose Shape/Border/Text Color: Select color for shape, border, and text by using the color picker. Press SELECT once you are happy with the color.
Edit the Icon: Once you have entered the information, you can tap 'save' which will save the actor icon and add them to the 'green room' for when you need them on stage. If you decide you want to adjust the icon later, you can always change the icon. For example, if you ever replace an actor in the show, you can easily re-name the icon and the new icon will appear on every chart in the show.
Import Performer Image: You can also choose to import an image for the icon, which will be saved at 1:1 ratio if you prefer to use that image or likeness.
Reorder/Edit Performer Icons:
By pressing the DELETE/RE-ORDER button you can re-order the icons by dragging the ‘handle’ and sliding the icon up or down in the list to change the order. By tapping on the ‘delete’ button to the left of the icon, you can choose to ‘delete’ the icon from the production. This will remove the performer from any existing charts.
SCENE LIST: Settings > Scenes
In order to create any charts, you must have at least ONE scene. By double tapping or by pressing the ‘add’ button, you can enter the name of the scene or number. The RETURN key will take you to the next line. You can also re-order or delete the scenes by pressing 'edit' button in the same way you re-order or delete performer icons.
COLLABORATING:
Add Collaborator: Settings > Collaborators > Add:
Adding collaborators to your production can be done on the web system, by adding the email address of the new collaborator. To add multiple collaborators, separate emails with comma. Choose whether to share the Entire Production or Selected Sections of the production for them to be able to edit:
Master Collaborator: Turning this ON allows the new master collaborator to add other collaborators to the production without requiring permission of the owner. If this is OFF, the user will have access as determined below.
Restrict PDF Creation: If this is turned ON the owner of the production will have to approve PDF creations and when approved the PDF created will show a watermark of the requested individual’s username (or can be determined by owner when approving the request) on every page. You can allow the new master collaborator to bypass the request for a determined number of times without requiring approval.
ACCESS LEVELS:
Limited: Collaborator will be able to VIEW the production charts and make personal notes which do not attach to the original, make personal notes on a clean copy of their script. This is ideal for actors/understudies.
Full: If you choose Full Acess this will give the user full access to edit charts, script/score, settings of the production. The changes they make will be synced to the original production so it’s important that you only allow someone you trust to make edits to the production. You both can be working at the same time. In the case that you both make a change to the same chart, or same staff, or same page in the script, the most recently synced version will be kept. Make sure you sync frequently to avoid any conflicts.
Custom: Choose to give the collaborator a private PDF (a clean script) or share your script. Or give them access to specific scene charts. You can change their settings at any time, including ending the collaboration.
Syncing Tips: In working with collaborators, it’s important to keep in mind that you are both editing the same document. If you are working in different scenes or different charts there should be no conflict. However, if you both make a change to the same chart, or same staff, or same script page, only the last synced version will be kept. If you are both working in the same scene, it’s important you communicate who is doing what so you don’t lose any information. When working on iPad, sync your work frequently so it will upload to the system. When working on the web, press SAVE frequently so those changes can be saved and sent to any shared devices. On the iPad, the sync icon will activate (turn red and pulse) when there are updates detected from the web version. Be sure to tap the sync button when it activates to sync the changes.
Editing Collaboration/Stop Collaborating: Settings > Collaborate
If you wish to stop collaborating with another user, tap on their email address to see their settings. You can change the scenes you give access to, or tap ‘Stop Collaborating’ to take the production out of their account completely. They will be notified and the production will disappear from their account, both on the web and the iPad.
COPY PRODUCTION:
COPY PRODUCTION: Settings > Copy Production
You can create a duplicate production by tapping Settings > Copy production.
Production Name: Give your new production a different name so you can distinguish it. For example, ‘Romeo and Juliet Broadway’ can become ‘Romeo and Juliet Tour.’
Production Type: Choose if you want it to be connected to the script or the Staging Score. Note: if you keep it the same type, the script or score will also copy over. If the existing production is a Script and you choose Score, you will need to create the score and vice versa.
Dimensions: You can choose the dimensions of the new production or keep the dimensions the same. If your new production is smaller than the original, any objects that were placed on the outer edges will be pushed in so you may need to decide what to do with offstage space.
New Ground Plan: The original ground plan will be copied over. If you need to change the ground plan for the new production, go to Settings > Stage Dimension > Edit Permanent Stage > Import new ground plan (using the same process as you did originally).
Rename Performers: Settings > Performer Icon:
You can easily rename the performer icons for a new production so the icons match the current cast. Tap on the existing icon and change the text within the icon and press ‘save’. This will change the icon across the entire production with the new names.
DELETE PRODUCTION:
If you wish to delete the entire production, to go Settings > and tap DELETE PRODUCTION. This will place that production in the trash where it will be held for 30 days. If you wish to restore, go to TRASH > Restore and confirm ‘Yes’ to restore to your queue.
PRINTING/CREATING PDF:
You can print your production by creating a PDF of the production and printing the PDF by tapping the PRINT icon. Choose what aspects of the production you want to print:
Printing Charts/Script:
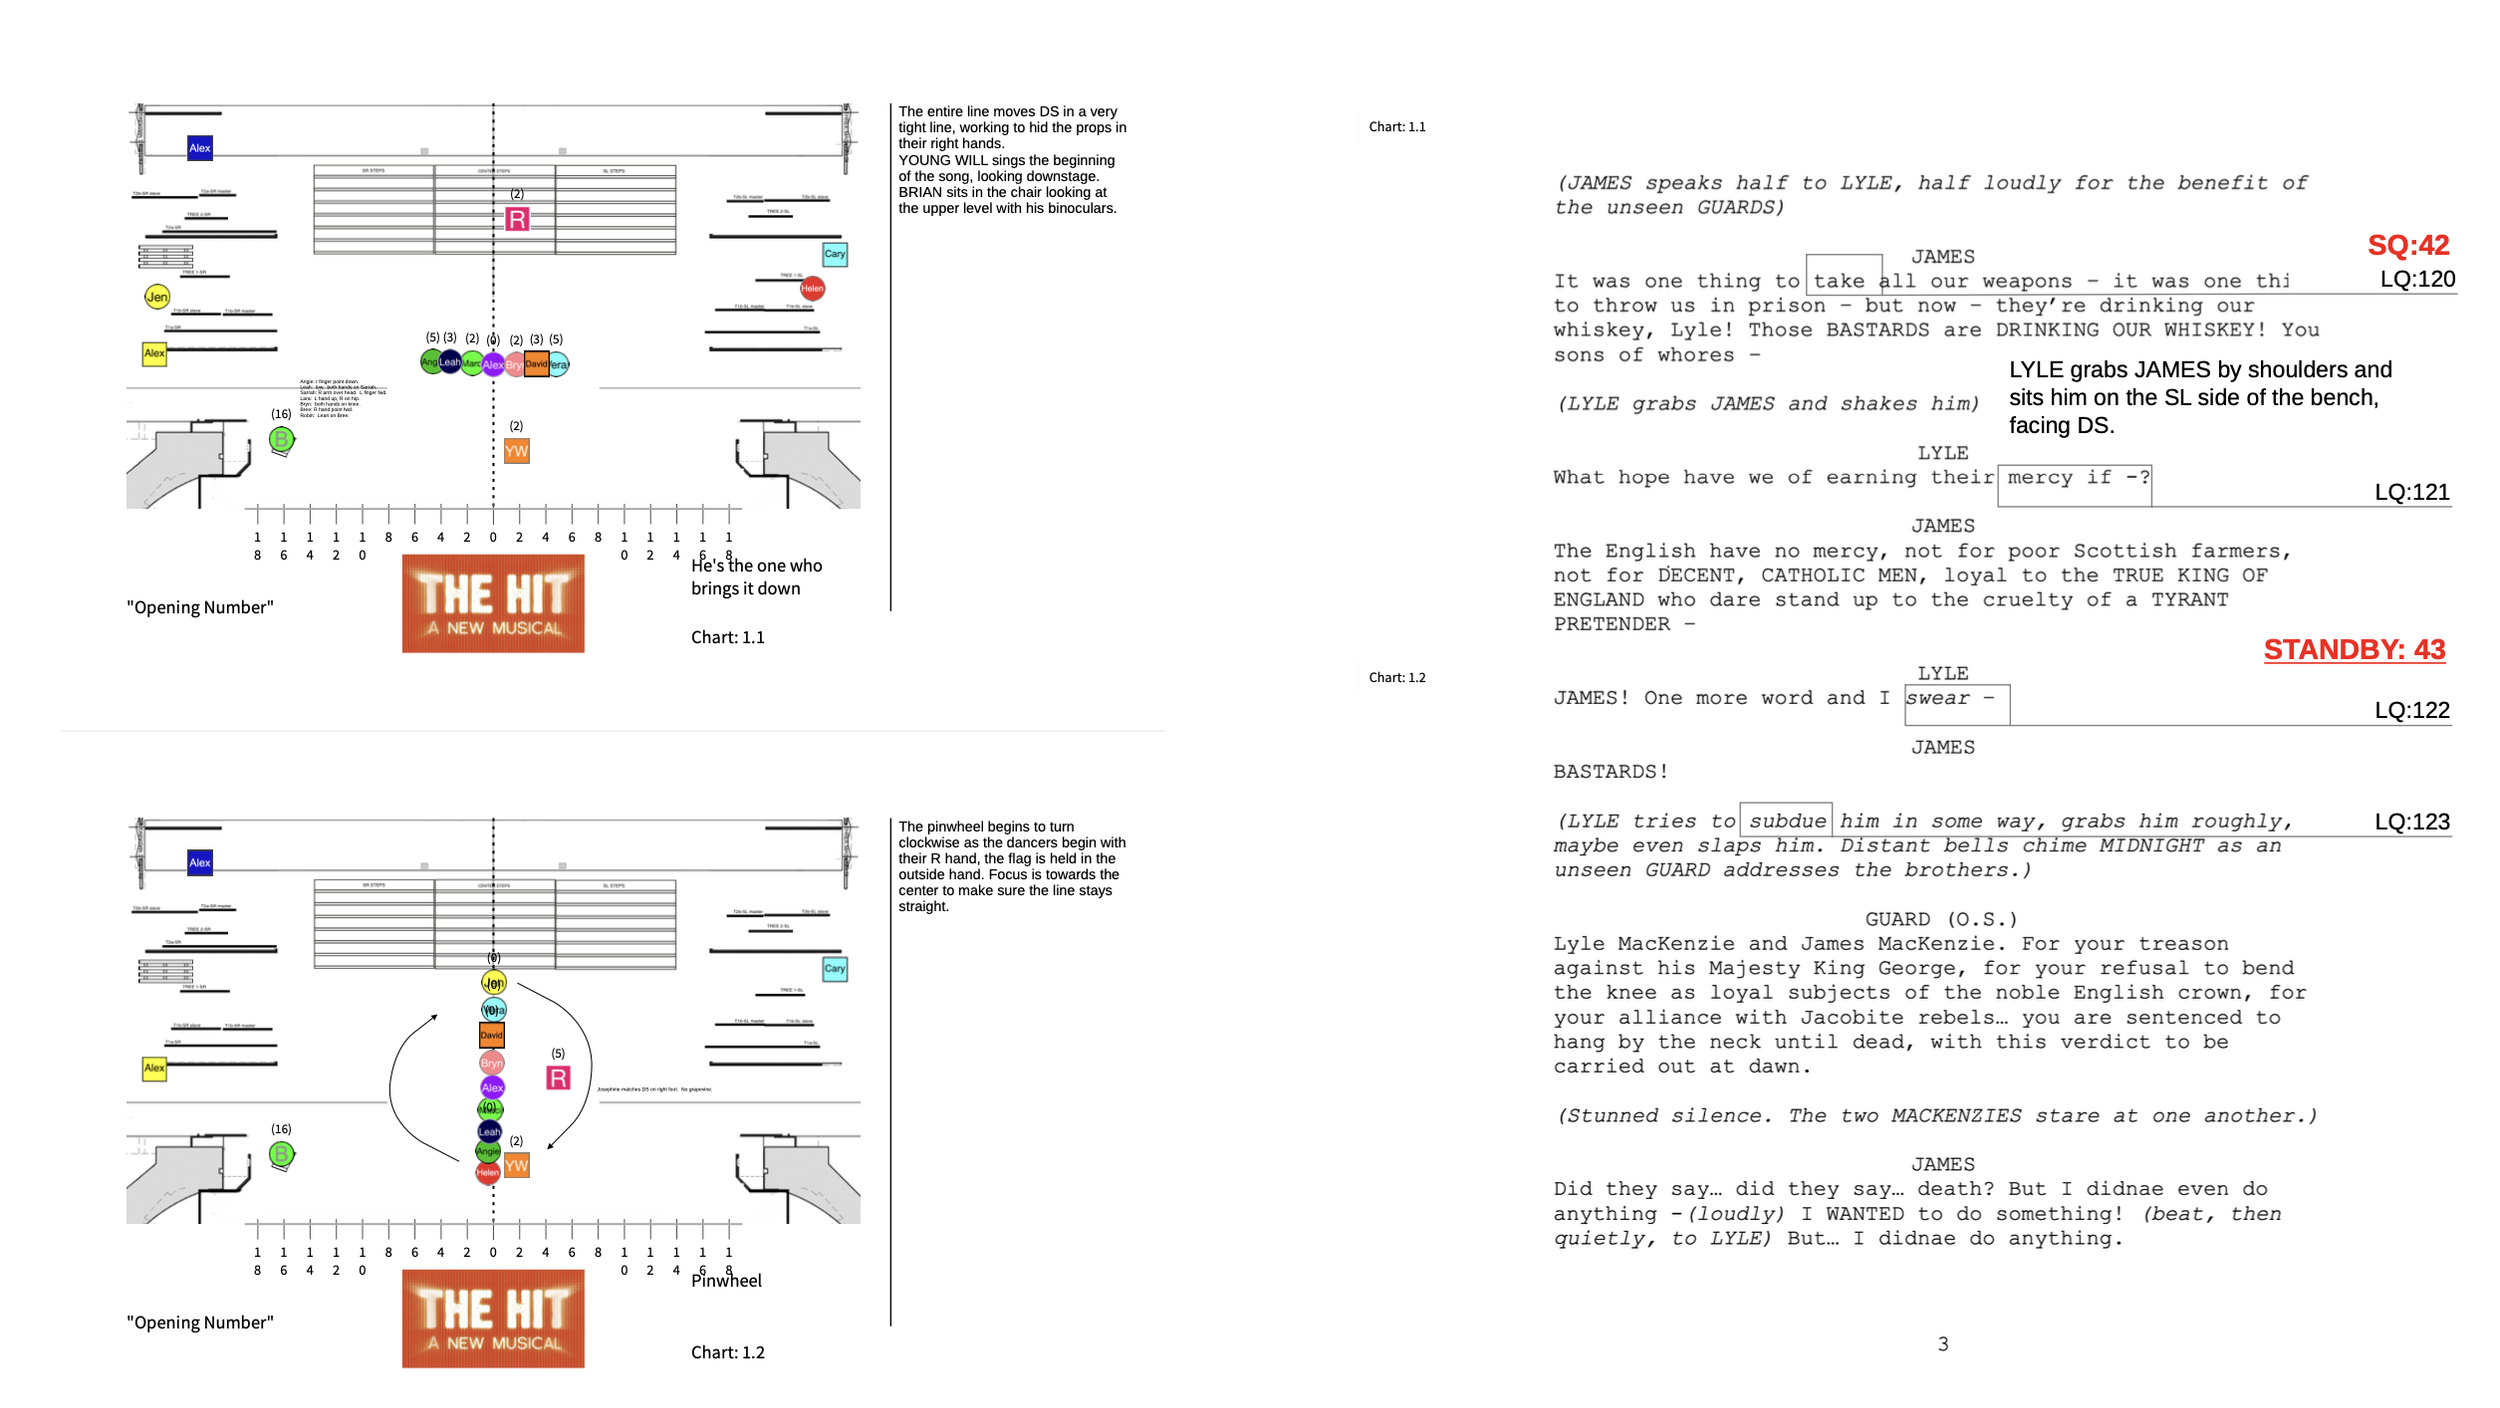
PDF sample of Charts/Script (charts on left side, script on right).
Production – Charts/Script: You can choose to print the entire production, both charts and script. The script will appear on the right side and the charts and notes (if selected) will be printed on the left side (back of the page) according to the sections of the script the charts have been linked. See example.
Production – Charts: This will print the charts only for the entire production, one chart per page.
Production – Script: This will print the entire script for the production.
Current Scene – Charts: This will print all the charts in the currently selected scene, one per page.
Current Chart: This will print just the currently selected chart.
Download PDF:
The system will notify you that the PDF has been created and will appear at the bottom of the print icon list. Tap on the download icon. The system will automatically open the PDF in the browser by default. It is recommended that you open the PDF in a PDF reader. Set your browser to open PDF in reader instead of browser.
IMPORT FONTS INTO WEB:
In order to ensure that the text on your production matches exactly with other devices, be sure to install the fonts into your browser by following the prompts on your homepage on the web. If you don’t do this, there will be small inconsistencies in the spacing of any text in the production as you compare with your device and will make a difference when you print.


